


Your guide set is chosen, your spacing is worked out, and that is exactly when the trouble starts. The thread will not climb onto the foot, the guide slides while you wrap, and a KT 4 running guide on the tip of a UL blank turns into an exercise in patience. These difficulties almost always come from the preparation, not from the wrapping itself.
Here is the method we use in the workshop, the one we teach beginners with. It takes a little time up front, but once every guide is prepared and pre-aligned, you move through them very quickly. If you have not settled on your guides yet, our comparison of ceramics and frames will help you decide before you start.
Nothing exotic, and you probably already own half of this list. Two consumables are the exception and cannot be improvised: the thread and the varnish.
- a file and fine grit sandpaper, 400 or 500, to prepare the foot
- a razor blade or a craft knife with a fresh blade
- a white pencil, to mark the blank visibly and erasably
- masking tape, the kind that peels off without leaving adhesive
- office rubber bands, plus latex tubing or dental elastics for the small guides
- wrapping thread in a diameter suited to the rod
- a burnisher, or a fingernail at a push
On thread diameter, the trade-off is always the same: the finer the thread, the more discreet and lighter the wrap, but the trickier the climb onto the foot. For a first rod, take a medium diameter. You will gain in consistency, and the weight difference across the whole guide train stays marginal.
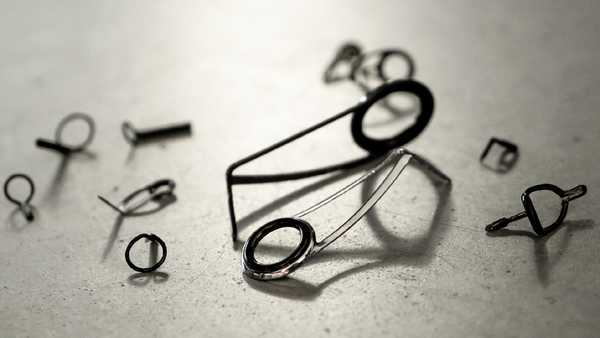
Most tutorials pass over this step in silence, and yet it decides whether the thread climbs onto the foot by itself or has to be forced turn after turn. The idea is to sand the foot lightly on a bevel, creating a gentle ramp between the blank and the top of the foot. Start with the file to rough it out, finish with 400 grit paper: the aim is to remove the sharp edge, not to dig into the metal. An edge left as it is will cut the thread over time, and a foot that is worked too hard weakens the guide.
Prepare the reduction guides and the running guides the same way, according to their size. In practice, guides from size 6 upwards deserve this treatment; below that, the foot is already so thin that the thread climbs unaided.
Finally, run a permanent black marker over the prepared foot and let it dry for a few minutes. Under black thread that is not fully packed, bare metal throws back light reflections that show. With the marker, the foot disappears under the wrap.
Mark the position of each guide with the white pencil, following your spacing. If you have not worked out your guide train yet, the Fuji specification gives the distances and sizes to follow according to blank length.
Then wind a turn of masking tape just past your mark, to form a stop. While you are there, carry the spine mark over onto the tape: you will have the line in front of you when you place the guide, whereas the pencil mark will be hidden.
Prepare all your stops in one go, with pre-cut tape. It is repetitive, but it is what lets you then run through the wraps without interruption.
Watch what you are aligning on the line: it is the guide ring, not the foot. On a large stripper, the gap between the two easily exceeds a centimetre, and a guide train offset by that much at every guide no longer spreads the load as intended.
We do not glue guides before wrapping them. A spot of glue makes correction impossible, whereas alignment is judged at the end, once every guide is fitted. A rubber band holds easily for the length of a wrap, and it cuts away in a second.
Large guides
Take office rubber bands and tie a simple knot in them to set the right length. Use two for a stripper. The guide should overlap the tape very slightly: that is what presses the foot against the blank and closes the gap the thread would otherwise catch in.
Small guides and the running section
A single band is enough, but it has to be genuinely fine. Slide your latex tubing rings or dental elastics onto the blank before fitting a single guide: once the running section is started, you will no longer be able to pass them over the tip.
Position the band in the middle of the foot to begin, then shift it gradually towards the ring as the wrap progresses.
Start as close to the foot as possible, on the blank side. Starting too far out lengthens the wrap, so the amount of varnish, so the weight at the tip.
Make a dead turn, pass the thread over the loop, hold with your finger and trap the thread under the first turns. After four or five turns the wrap holds on its own: cut the excess starting tag then and continue in touching turns to the end of the foot.
The critical moment is the thread climbing onto the foot. If your bevel is clean, it climbs by itself. If not, guide it with a fingernail over two or three turns, until it takes the angle. The thicker the thread, the easier this climb, which is why a first rod in medium thread is more forgiving.
Once you are well along, cut the first band, then the second, and remove the tape. The wrap already in place holds the guide.
For the pull-through loop we use an offcut of braid rather than wrapping thread: it slides better under the turns and it takes the pull without snapping at the moment you draw it through.
Place the loop under the last turns, pass the tag through it, then pull to bring it back under the wrap. After that, the invisible finish comes down to three moves: tension and trap the thread very slightly under the wrap, barely a millimetre; cut leaving one or two millimetres; pull at 45 degrees so the excess tucks under the turns. The tag does not reappear and there is nothing left to trim.
Finish by packing the turns with a burnisher, to tighten the weave and close the gaps varnish would seep into. A lighter passed at a distance then burns off the fibres that stand proud.
All that remains is to erase the white pencil marks from the blank, working a loop of thread back and forth over them.
On the running guides, do not cut the thread flush once the wrap is finished. Always leave an excess hanging.
The reason is mechanical: alignment is judged with the rod assembled, sighting from the butt, and you often need to rotate one or two guides by a few degrees. If your thread is cut flush, the wrap comes undone during that rotation. With an excess, you can adjust without worry and cut only once alignment is confirmed.
Everything above is done by hand, on your knees, and that is how most builders start. The question of a machine comes up from the moment you build several rods.
The gain is not measured in speed. It lies in consistency of tension, and that is where the gap between an apprentice wrap and a clean one plays out. A support that holds the blank and a tensioner that brakes the spool remove the two sources of irregularity: the hand holding the rod and the one metering the tension.
Wrapping machines range from a simple manual support to a motorised bench. For regular amateur use, a hand wrapper covers most of the need.
A wrap is only finished once it is varnished. Two part epoxy varnish is the only one that lasts on a rod wrap, and it imposes one constraint: the rod has to turn through several hours of curing, otherwise the varnish runs and forms a drip under the guide.
Then let it cure right through for a few days before loading the rod. Varnish that feels dry on the surface is not yet dry in the thickness, and a wrap put back into fishing too early marks and clouds.
If today's job is a repair rather than a new build, our dedicated tutorial on replacing a broken guide covers the operation from removing the old wrap onwards. And if you get stuck on a step, write to us: we build rods every day at the workshop.






Comments
0Log in to leave a comment.
Log in