


Building your first rod takes very little equipment, but there is one thing you cannot improvise: the support that holds the blank while you fit the guides. Without it, the rod rolls, the thread tension changes with every turn and the wraps refuse to sit tight. That is the job of a rod wrapping jig, and you can build one in an afternoon with what you already have in the workshop.
This tutorial goes back to the drawing we have been sharing on the blog for years, with the dimensions, the settings and the mistakes that come up most often. It is written for anyone who wants to start rodbuilding without investing in a machine for a first build.
A wrapping jig does not make the wrap for you. It takes care of what your hands cannot do at the same time, and that is why two builders using the same thread do not get the same result.
- It holds the blank aligned and free to rotate: the rod turns on its axis without moving sideways.
- It applies constant tension to the thread, whatever speed you turn at.
- It frees both hands, one to turn the rod, the other to guide the thread and pack the turns.
A hand wrapper set up properly gives the same result as a motorised machine, simply more slowly. That is why a home built jig still makes sense, even when you build several rods a year.
Nothing exotic on this list. Most rodbuilders find everything at the back of the garage, and the few missing parts take one trip to the hardware shop.
- A board 80 to 100 cm long, 15 to 20 cm wide and 18 to 20 mm thick for the base. The heavier it is, the more stable the jig stays.
- Three to four uprights 10 to 12 cm high, cut from batten or 18 mm plywood.
- Self adhesive felt, an offcut of leather or carpet to line the notches.
- Brackets and wood screws for assembly, a threaded rod or a long bolt for the spool axle.
- Two wide rubber bands, or a strip of inner tube, for tension and for holding the blank.
- Your spools of wrapping thread, size A for light rods and fine trim, size D for powerful builds.
The drawing below is worth more than a long explanation. The dimensions are not critical, the alignment of the V notches and the stability of the whole thing are.

- Cut the uprights with a 90 degree V, around 2 cm deep. A V that is too deep traps large diameter blanks, a V that is too open lets the rod move.
- Line every V with felt. Lined notches prevent micro scratches on the blank finish and damp the roll.
- Fit two uprights at the ends of the board and a third in the middle. On a two piece blank, that centre upright stops the flex during rotation.
- Mount the spool axle on a fourth upright, at one end, with the rubber band acting as a brake.
- Run the thread between the pages of a book laid flat on the board. It is the simplest tension system to set up.
- Check before you screw anything down for good: lay a blank in place, turn it by hand, the bottom of each V must sit at the same height from one upright to the next.
And the result, once assembled:

One last point of method: before wrapping, position and hold your guides with a spot of hot melt glue. You can still slide them for final alignment without them moving while you lay the thread. The move is described in detail in our guide to fitting and wrapping the guides.
This is where the quality of your wraps is decided, and it is also the point where a home built jig can match a commercial one. The thread has to leave the spool with firm but even resistance, no jerk and no tight spot.
The book method is more than enough to start with: the deeper you push the thread between the pages, the higher the tension climbs. You adjust as you test, page by page. The alternative is to fit a tension arm, a simple flexible rod with a ring in it, which filters the variations caused by the spool turning.
A few markers to validate your setting:
- The thread marks the blank slightly under the turn, without deforming it.
- The spool starts again without snatching when you resume rotation.
- The turns sit down against the previous one on their own, without you having to push them.
To pack the last turns and close an overlap, a smooth plastic burnisher does the job without marking the thread. It is the tool you find on every bench, along with the rest of the rodbuilding tools.
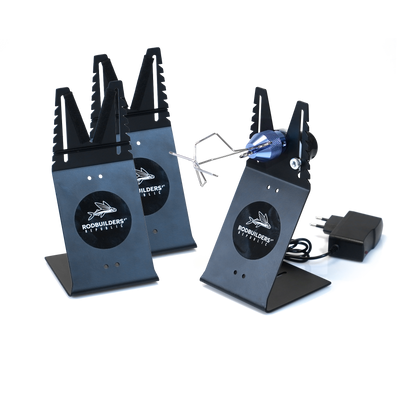
The wooden jig covers the whole wrapping phase, and it stops there. The next step, the finish, asks for something else. Epoxy resin needs slow continuous rotation over several hours, the time it takes to level out under gravity and cure without running. No board does that, you need a rod dryer.
Rotation around 6 rpm gives an even build, where a higher speed produces lopsided finishes. The subject is covered in our article on how to varnish a wrap.
The second limit is repeatability. Over a series of rods, finding exactly the same tension setting from one session to the next becomes tedious with a book. A commercial jig brings a clear, repeatable setting, height adjustable supports and a thread carriage that follows the wrap. If you build regularly, it is the investment that pays off fastest.
Start with the board. It will get your first rods built and it will teach you what you actually want from a jig. The day you complete your workshop with the rest of the rodbuilding equipment, it will still serve as a second station.










Comments
4merci pour les explications et la fiche technique 👌
Merci pour le plan, je vais du coup me lancer…
Bonjour Xavier,
Vous pouvez télécharger le plan en faisant un clic droit sur l’image puis « Enregistrer sous » (Elle n’est pas en full HD).
Vous pouvez aussi découvrir les banc à ligatures homemade qui ont étés fabriqués par d’autres rodbuilders sur notre Rodhouse Fanzone, cela vous donnera peut-être des idées ! 😉
Voici le lien : https://www.facebook.com/groups/254582922128881/search/?q=banc%20ligature
Bonjour ,
Merci pour ce plan, je vais me lancer.
Est il téléchargeable en HD?
Log in to leave a comment.
Log in