How to apply a "cut" sticker?
By Goulven Dolle.
Routed stickers, where only the lettering or motif appears, are the ones that render best, but also the least easy to lay straight, when you don't have this little trick.
Most people first remove all the protective tape and then try to lay them in one go, as precisely as possible ... One gust of wind that comes to stick the wrong part, and it's guaranteed failure.
One of the tricks is actually to glue them in two stages. First you pre-position your sticker using markers and repositionable tape (painter's tape). Then stick a strip of painter's tape in the middle, in line with your sticker, stick one half of your sticker, then the other. It's that simple. Let's take a look at the steps in detail, with a few photos.
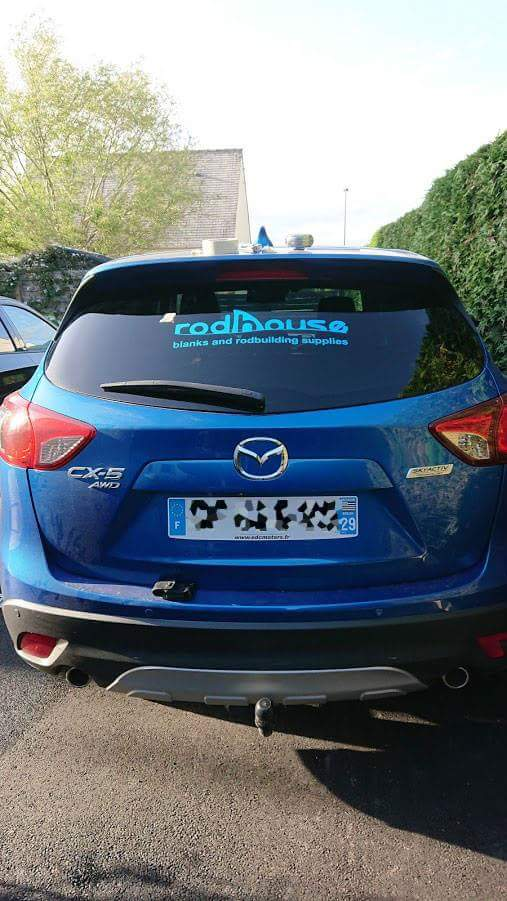
We start, whatever the substrate, by tracing out markings on the substrate, with a colored pencil or any other erasable pencil. In the case of a car rear window, you can also use the defroster cables, which are normally centered and symmetrical.

We then draw centered marks on all sides of the sticker.


We then position the whole sticker, with its protective strips, temporarily securing it with painter's tape. It's just a question at this point of temporarily positioning the sticker in its final location, to be safe from mishandling, gusts of wind etc.
.
Once this is done, we place pieces of scotch tape to "separate" our sticker in half lengthwise, and start separating the protective strip from the sticker, working on only one half of the sticker. The other half is still attached to its protective strip, and held in place with painter's tape. As you can see from the photo, I even helped myself at this point with some scotch tape to hold the part I'm working on, since it was a bit windy that day.

Then we cut off half of the protective strip

All that's left to do is to fold the part neatly where it needs to go, in continuity with the other part still held by the tape, the positioning will be done to the exact mm.

The same operation is repeated for the left side.


Then use a credit card or similar to tamp down, starting from the center, working outwards, very slowly, to flush out the air bubbles.

Now you know how to apply a sticker to the nearest mm.






Leave a comment
All comments are moderated before being published.
This site is protected by hCaptcha and the hCaptcha Privacy Policy and Terms of Service apply.